Installation of ActiveImage Protector Linux 4.0
Revised on December 26, 2013
This document contains information about installation procedures
and basic precautions.
It is highly recommended that you read this document carefully
before starting to use ActiveImage Protector.
Table of Contents
Installation
Uninstallation
Set
up Windows console for remote management and connection to the
ActiveImage agent
Precautions
- Before starting the installation, ensure that
the system
requirements are met. To install the ActiveImage console
(GUI) in an x64 bit environment, ensure the
required modules are set up.
- Insert ActiveImage Protector's media into the
media drive of your computer.
- Double-click on the installer located in root
directory on the product's media, and select [Run in terminal].

* To install as a non-root user, use the following
procedures to launch the installer.
# su
Enter password for root account
# <Mount Point assigned for the product
media>/NetJapanAIPInstaller-4.0.0
- The Terminal is launched to display
the installation window. Select [Install].
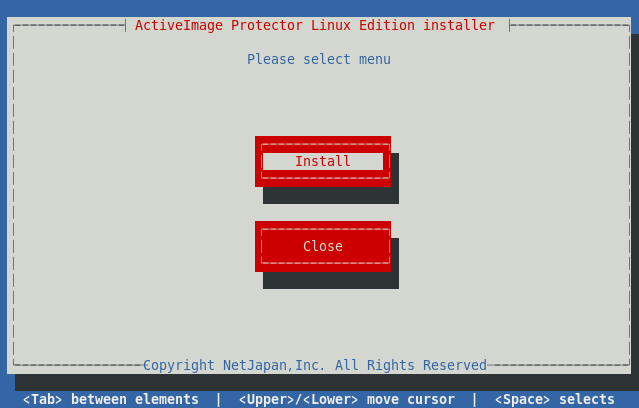
The Terminal can be operated via keyboard only. Cursor movement
can be controlled by using Tab or arrow keys. The space key or
Enter key selects an item.
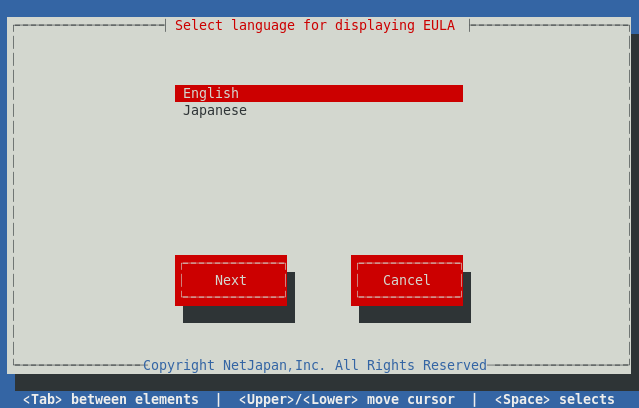
- Select the language to display End User License
Agreement.
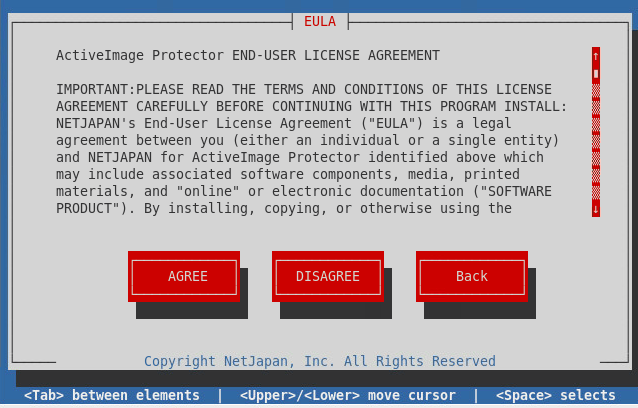
- Read the End User License Agreement carefully
and select [AGREE] to continue with the installation.
- Select the components and options to
install.
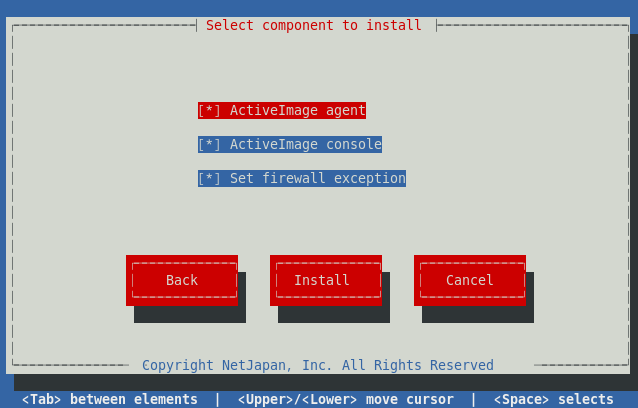
Components
ActiveImage agent
The ActiveImage agent includes services, the
copy engine and drivers which are required for backup processing
on a local host.
ActiveImage console
The ActiveImage console (GUI) is used to
operate the ActiveImage agent. The ActiveImage console connects to
the ActiveImage agents on remote hosts over the network.
Options
Set firewall exception
Ensure the Windows Firewall exception
settings are configured for the following ports to connect to
remote computers and browse network shared folders.
- TCP port 48236 (to connect to a remote computer)
- UDP port 48238 (to connect to a remote computer)
- UDP port 48239 (to connect to a remote computer)
- UDP port 137 (to browse shared folders)
- The installation process is started.
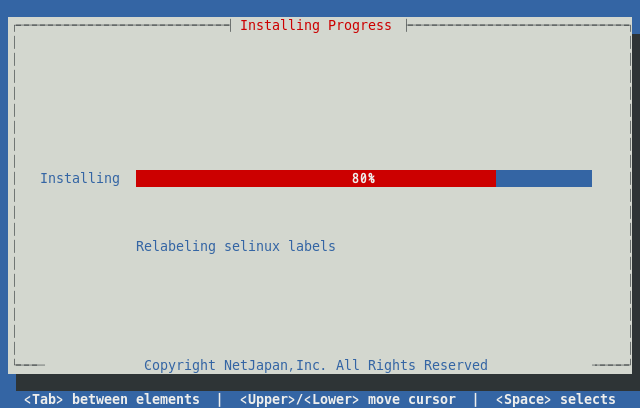
- Upon completion of the installation,
the following dialog is displayed in order to activate the
product.
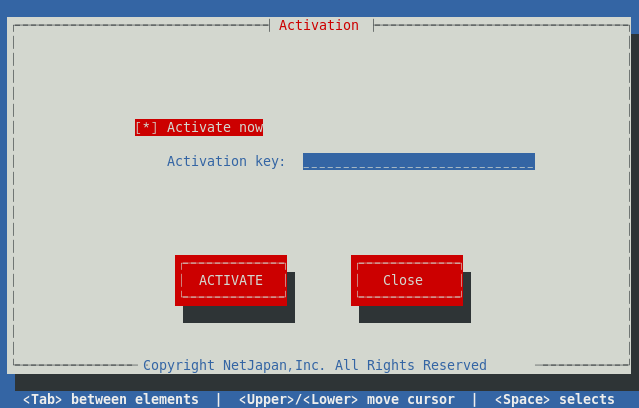
Enter the 25-digit activation key and select [ACTIVATE] to
activate the product. Pressing the [Close] key without entering
the activation key will launch ActiveImage Protector in trial
mode. The trial evaluation period for ActiveImage Protector is
60 days.
- The program is set up in the
"/opt/NetJapan" folder and configured to automatically start up
the ActiveImage Protector service when the system is booted up.
Note:
From the command line. the following command may be used in an
environment where X Window is not configured.
# <Mount Point assigned for the product
media>/NetJapanAIPInstaller-4.0.0
Back to Index
- Double-click on the installer located in root
directory on the product's media, and select [Run in terminal].
* To uninstall as a non-root user, use the following
procedures to launch the installer.
# su
Enter password for root account
# <Mount Point assigned for the product
media>/NetJapanAIPInstaller-4.0.0
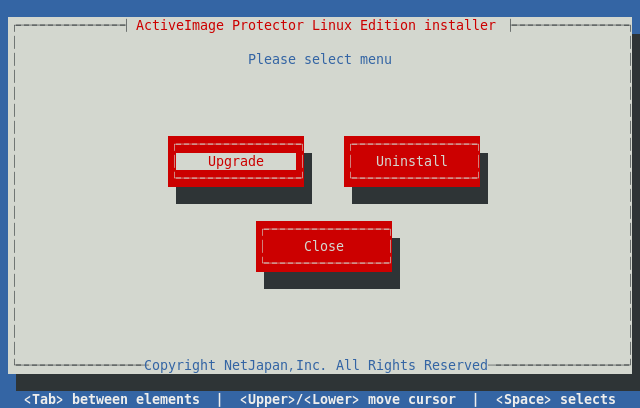
- Select [Uninstall] from the displayed
menu.
- To retain the current configuration
settings and backup schedules after uninstalling ActiveImage
Protector, select [YES].
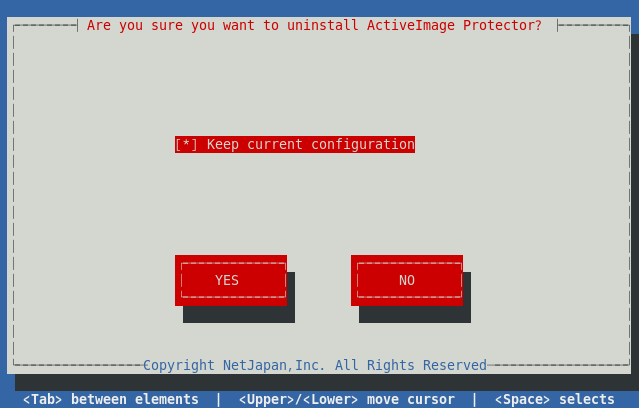
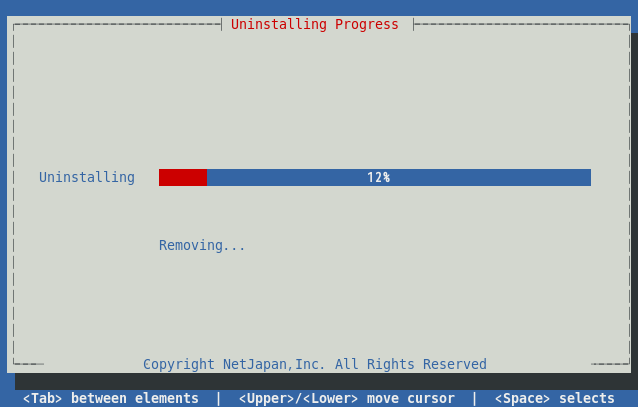
- The Uninstall process is started.
Please wait until uninstallation completes.
Back to Index
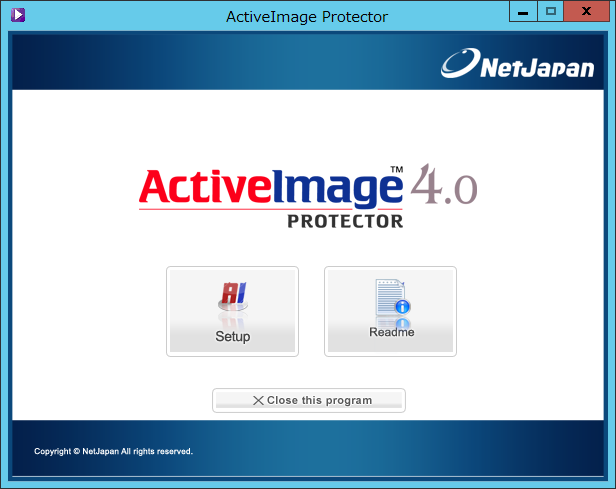
- Insert the ActiveImage Protector's media into
the media drive of your Windows computer. Click on [Setup] to
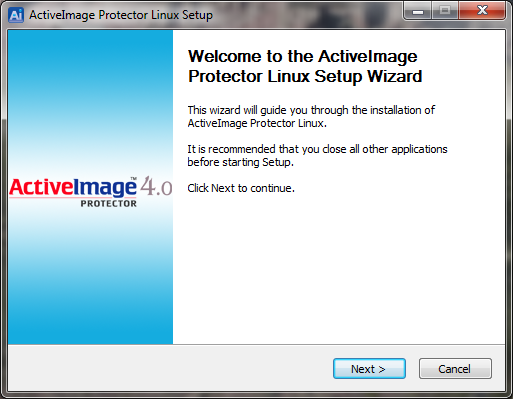
launch the installer.
- The wizard will guide you through the
installation.
- Upon completion of the installation
and the ActiveImage console is launched, the following dialog is
displayed.

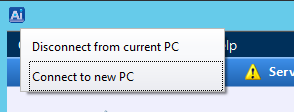
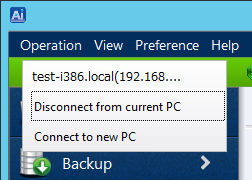
- Click on the connection status in the
upper left corner to display the pull-down menu, and select
[Connect to New Computer].
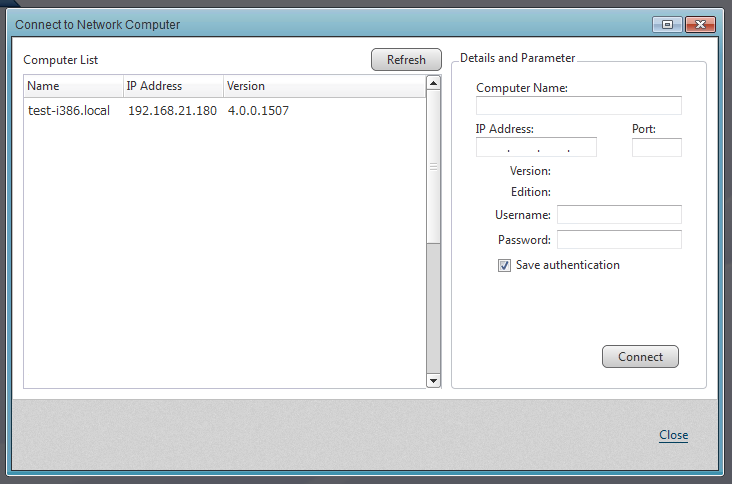
- The [Connect to Network Computer]
dialog is displayed. To connect to a network computer, select a
Linux server from the list or enter the host name or IP address
for the network computer. Enter root account for the network
computer, and click on [Connect].
- When the connection is established,
the color of the status bar on top is changed from blue to
green.

- To disconnect from the remote
computer, select [Disconnect].
Back to Index
- To run the installation or uninstallation
procedures, it is necessary to log in as root user. To install
or uninstall as a non-root user, please use the following
procedures to launch the installer.
# su
Enter password for root account
# <Mount Point assigned for the product
media>/NetJapanAIPInstaller-4.0.0
Back to Table
of Contents
Back to Index